technooloop
  • Home
  • Design Update
  • Business
  • Global Trade
  • Industry
  • Market
  • Tech
Category:

Tech

Tech

How to Tune Your Battery Coating Line Without Burning Through Budget?

by Nevaeh November 26, 2025
written by Nevaeh

A Quick Reality Check

Here’s the truth: most coating lines don’t fail from one big mistake; they leak time and yield through small, silent drifts. The battery coating machine is the heartbeat of that line. In busy shops, teams ask battery coating machine manufacturers why throughput stalls when the schedule looks solid. Data backs it up: a 1% coat weight variance can push scrap past 8%, while unplanned stops eat 3–6 hours a week—often due to web tension spikes or uneven drying. Picture the scene. Operators chase a streak; quality flags anode off-target; maintenance swaps a filter… and the clock keeps ticking.

What if the real issue isn’t a single parameter, but slow feedback loops and drift that stacks up? Slot-die gaps creep. Drying oven zones run a few degrees off. The trend charts look okay until they don’t. So we ask: is the fix more sensors, more staff, or smarter control? (Hint: it’s not only “more.”) Let’s unpack the gaps—and where they hide—so you can cut waste without buying a whole new line. Onward to what’s actually dragging performance.

Where Traditional Fixes Fall Short

What’s the real bottleneck?

Many plants still rely on manual offsets and weekly “golden recipe” tweaks. That works—until it doesn’t. The flaw is lag. By the time you adjust a PID loop, the web has moved meters downline. Coat weight drift, edge bead, and micro-streaks are already baked in. Traditional audits spot issues late, not live. Inline metrology, if present, often isn’t tied to closed-loop action. So you get data, but not decisions. Look, it’s simpler than you think: if the system can’t see change within seconds, it can’t correct before material is wasted.

Another blind spot: energy and solvent handling. Older lines treat solvent recovery and oven balance as back-of-house. But drying defines adhesion and porosity. A small dew point swing or uneven exhaust pulls can warp the binder profile. Then calendering nip pressure has to “fix” what the oven broke—funny how that works, right? Even top battery coating machine manufacturers can’t save yield if upstream specs wander. The pain feels like alarms and rework. The cause is fragmented control and late feedback.

Smarter Control, Real Gains: A Comparative Look Ahead

What’s Next

The better path blends faster sensing with tighter loops. Think web tension arrays tied to slot-die land height, plus vision that reads coat weight in-line, not in a lab later. New stacks place edge computing nodes right at the line, so corrections happen in milliseconds. Add model-based drying—zone-by-zone heat and airflow tuned to solvent curves—and the line stabilizes before drift compounds. When a lithium battery coating machine runs with closed-loop vision and adaptive ovens, you see steadier porosity and lower binder migration. Fewer streaks. Less scrap. And yes, tighter cost control.

Compared to legacy approaches, you’re swapping “measure, then fix later” for “predict, then prevent.” Inline metrology closes the loop; the PLC stops being just a scheduler and becomes a guardian. Dew point control stops chasing humidity and starts holding it. Even power converters for drives play a role, smoothing torque so web flutter stays low. The result isn’t magic; it’s systems thinking stitched into the line—all the way from slot-die to calender. Short runs stabilize faster. Changeovers sting less. Downtime shrinks—and yes, the alarms will be quieter.

Before you choose your next step, use three checks. First, response speed: can the system detect and correct coat weight or tension shifts in under a second, with clear logs? Second, process coupling: do drying profiles, solvent recovery, and calendering settings talk to each other automatically, not by operator memory? Third, proof under load: show stable yield at peak speed, not just slow trials. Meet these, and you’ll scale without the burn. If you want a place to start or a benchmark to compare, see KATOP for reference points—not hype, just baselines you can test.

Tech

5 Smart Ways to Compare a Hybrid Inverter Factory (Before You Lock In)

by Juniper November 21, 2025
written by Juniper

Why Choosing the Right Hybrid Inverter Factory Matters

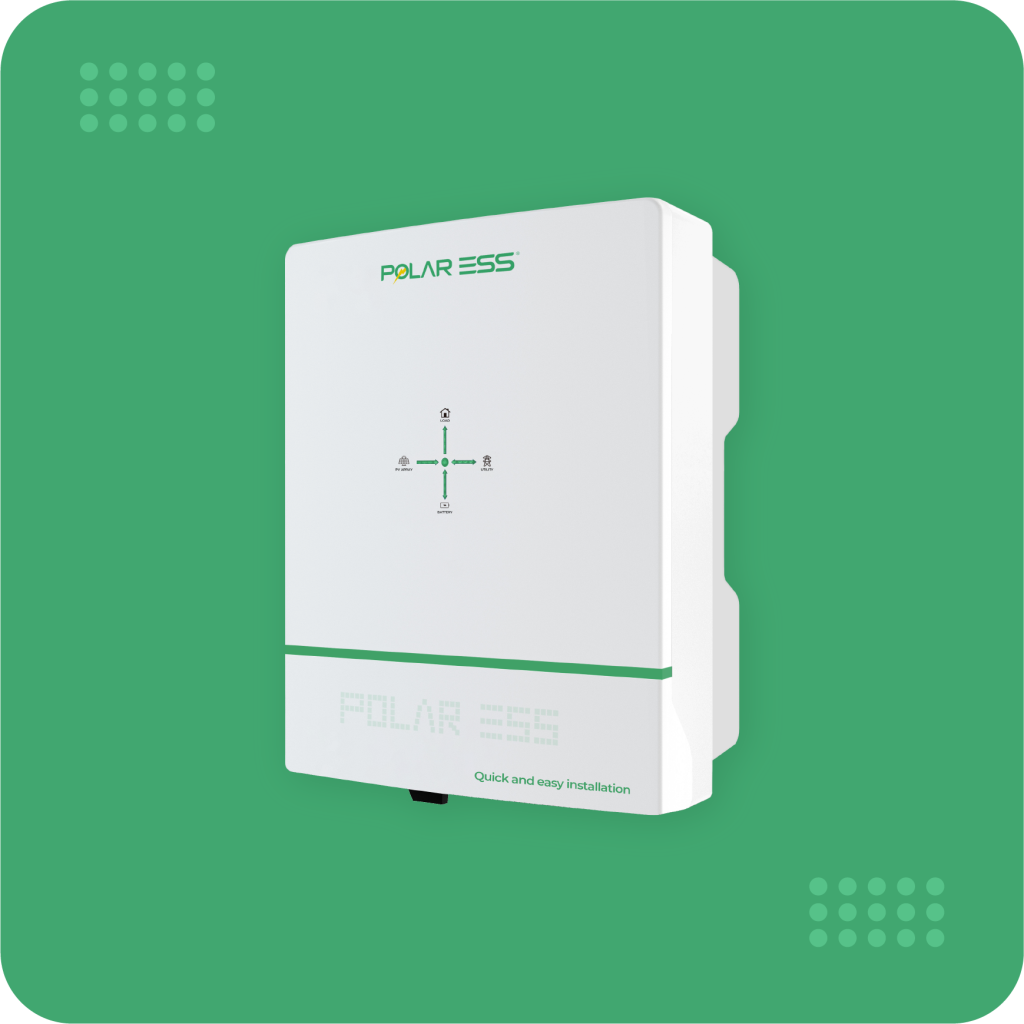
Power reliability is a plan, not a perk. In a busy shop or home, a few minutes of downtime can break routine and mood alike. A hybrid inverter factory sets the pace for how well that plan works. In many towns, outages still arrive a few times a month, and backups strain when demand spikes. When people explore options like hybrid solar inverter split phase, they look for more than a spec sheet. They want steady start-up for compressors, clean switchover, and safe charging for batteries. The data tells a simple story: systems with tighter control loops, better MPPT tracking, and solid battery management system links have fewer trips and less wear. But are all factories building to the same control standard (or the same test routine)? That is the real question we should ask.

Direct view, small steps. Compare how factories handle surge, heat, and noise—harmonic distortion hides in plain sight. Check if anti-islanding is fast, if firmware updates are safe, and if EMC is tested beyond minimum. Look, it’s simpler than you think. Start from real loads, not just lab loads. Then ask: what breaks first, and why? Let’s move to the places where older choices stumble, so the differences become clear.

Hidden Gaps in Traditional Split-Phase Systems

Where do legacy designs lose their edge?

Traditional split-phase setups often rely on bulk transformers and slow transfer relays. That mix can mean longer switchover times, more heat, and higher idle loss. In homes with mixed 120/240 V loads, the neutral can drift if phase balancing is weak—funny how that works, right? With only one MPPT channel, rooftop strings sit at the wrong voltage when clouds shift. The result is clipping, heat, and fewer usable watt-hours by dusk. Add in older DSP control and you get looser regulation under motor inrush. Pumps, fridges, or welders then draw more current than planned, and breakers start talking.

There is also the noise you do not hear: poor filtering raises total harmonic distortion on the AC bus. Sensitive gear sees it first. Lights flicker; UPS units click. Without a tight link to the BMS over CAN, charge windows drift and cells age faster. Firmware that cannot update safely leaves vulnerabilities in anti-islanding logic. And yes, some boxes still skip proper thermal mapping—one hot corner, one early shutdown. The pattern is clear. Older designs can run, but they don’t adapt. They react. That is the gap a modern factory must close.

Comparing What’s Next: New Principles, Clear Wins

What’s Next

Modern split-phase hybrids aim to be grid-forming, not just grid-following. The difference sits in the control loops and the power stage. SiC-based power converters switch cleaner, so the AC waveform stays tight under surge. Multi-MPPT inputs keep strings in their sweet spot even when roofs face east and west. A fast digital signal processor, paired with predictive control, shortens response time when a motor starts. That lets the voltage stay flat, and your tools stay calm. Edge computing nodes in the EMS push updates and logs, so you see faults before they matter—small things, big impact.

Modularity helps too. Swappable power bricks and a cooled DC bus cut heat stress. Islanding detection improves when relay logic and firmware act in microseconds (not milliseconds). If your system spreads across a workshop and a house, droop control can share load smoothly. Real-time CAN with the BMS keeps charge current right for the cell chemistry. In day-to-day life, this means fewer resets and longer battery life. A well-built unit—like a robust split phase inverter 48v—makes this visible as quiet operation, tighter frequency, and a steadier neutral. Different on paper, very different in use.

So how do you measure factories, not just products? Start with test depth. Do they heat soak at full load? Do they publish THD under nonlinear loads? Next, ask about firmware lifecycle: signed updates, rollback, and audit logs. Finally, look at integration. Does the inverter talk cleanly to meters, PV optimizers, and storage? When these answers are clear, your risk drops—fast.

How to Decide Without Guesswork

You have seen the gaps and the fixes, so keep the review simple and practical—because long checklists hide weak points. Use three metrics. First, dynamic performance: switchover time, voltage sag during 5x motor start, and THD under 50% nonlinear load. Second, thermal stability: continuous rating at 40–45°C with no derate, plus fan-noise control. Third, integration strength: MPPT range for your strings, BMS protocol support, and safe firmware update flow. If a factory shows evidence here (data, not slogans), you gain confidence. If not, you wait—no harm in patience. At the end of the day, a good hybrid makes your space feel uneventful in the best way. Steady power. Quiet nights. Tools that just work—funny how reliability feels invisible when it’s done right. Megarevo

Tech

Lessons From Supplier Slip-ups: A Comparative Look at Custom Furniture Solution China

by Anderson Briella November 19, 2025
written by Anderson Briella

Introduction — Why This Moment Matters

Ever wondered why a small order for a bench can turn into a monthlong headache? That’s the kind of question that keeps me up when I’m helping designers and stores sort supply chains. custom furniture solution china plays into this all the time — prices, timelines, and specs shift faster than a summer storm here in the South. I once watched a studio lose 18% margin because finishes arrived mismatched (true story). Recent data shows many boutique brands face 20–30% variance in delivery dates when they don’t vet suppliers well. So how do you spot trouble early and steer clear? I want to walk you through that — plain talk, no fluff — and point to the practical checks that actually save time and money. Read on and you’ll see where the usual traps lie and what to do next.

custom furniture solution china

Part 2 — Technical Breakdown: Where Traditional Solutions Fall Short

When I talk to clients, I start by pointing them to a reliable partner — like a furniture manufacturer from china — and then I explain the tough parts. Traditional approaches often assume fixed lead times and perfect quality control. They don’t. Broken assumptions show up as late deliveries, warped veneers, or missed tolerances from CNC machining. Let me break that down: suppliers quote based on ideal runs, but small-batch custom jobs bump the MOQ up, push schedules back, and expose weak process control. I see three core failures repeatedly: poor CAD-to-shop translation, vague finish specs, and no contingency for materials lead time. That combo will wreck a launch window quick. Look, it’s simpler than you think — track those three things early and you dodge most drama.

What’s actually failing?

Here’s the technical truth. First, CAD layouts often leave out assembly details — dovetail joinery vs. cam fittings matter for tooling and cost. Second, suppliers sometimes group diverse items into one production run to hit cost targets, which changes surface finish and complicates QA. Third, communication gaps about sampling mean a single approved prototype becomes the entire project’s baseline — even when the full run behaves differently. I recommend setting clear inspection gates: prototype sign-off, mid-run sampling, and pre-shipment checks. We use basic measurement reports and photos to lock tolerances. That approach cuts surprises. — funny how that works, right?

custom furniture solution china

Part 3 — Case Example and Future Outlook: How to Move Forward

I want to give you a concrete example. I worked with a small chain that needed a modular table line. We mapped specifications, ran a pilot with one supplier, and then scaled using lean manufacturing principles. The supplier adopted minor CAD revisions for nesting and reduced waste by 12%. With improved materials forecasting, lead time dropped by two weeks. What changed most was process discipline: sample approvals, tooling checks, and a shared production calendar. We used simple dashboards to track progress — nothing exotic — and tied delivery milestones into purchase orders. That kind of furniture project management made the difference between a stalled launch and on-time stores.

What’s Next?

Looking ahead, I see smart sourcing blending better digital collaboration with clearer evaluation metrics. Digital mockups, better supplier scorecards, and tighter MOQ planning will help. I suggest you start small: pilot a new SKU, document every change, and measure outcomes. If you keep things tight, you avoid big surprises. Also — and this matters — keep a small buffer for finishes; stains and varnishes hate humidity in some ports, and that will bite you if you ignore it.

Final takeaways — my advisory close: when you evaluate custom furniture solutions from China, use these three metrics. One: on-time delivery rate (aim for 95%+ on pilot runs). Two: first-pass quality rate (target 98% or better on critical tolerances like joinery and CNC cut accuracy). Three: responsiveness and transparency (how fast do they reply with photos and QC data?). Those three tell you more than glossy catalogues. If you follow that, you’ll find better partners faster. For practical help, check partners who combine technical skill with strong project practices — like BFP Furniture.

Tech

A Complete Look at Controlling Batch Risk in Fetal Bovine Serum Use

by Anderson Briella November 15, 2025
written by Anderson Briella

Hidden faults in heat inactivation that labs miss

I remember a Monday in 2016 — a small lab in Boston had three cell lines acting strange after a supplier swap. In the second sentence we had already moved to heat inactivated fetal bovine serum, and fetal bovine serum became the first suspect on everyone’s list. The team logged a 30% drop in viability on primary fibroblasts over three passages; my gut said this was not just a bad lot. So what broke down? Why did the usual “56°C for 30 minutes” step not save the day?

fetal bovine serum

I’ve been in B2B life-science supply chain work for over 15 years, and I can tell you plain: heat inactivation hides problems more often than it solves them. Complement inactivation is the goal, true, but slow heating denatures some growth factors too. I recall in March 2014 at a contract research lab in Cambridge we swapped to a new heat-inactivated lot of FBS for DMEM + 10% serum. The lab ran routine mycoplasma testing and passed, yet proliferation dropped by nearly 20% within a week. That taught me two verifiable things: one, functional assays expose damage faster than certificate checks; two, storage and handling (cold chain breaks at shipment) amplify heat’s downstream effects. Endotoxin spikes and lot-to-lot variability show up later — sometimes only in differentiation assays.

What’s the real problem?

The traditional fix assumes heat will only touch complement. In practice, heat affects albumin binding, exposes hydrophobic patches on growth factors, and can increase aggregate formation. Those aggregates can change cell attachment metrics and skew your transfection efficiency. We tested three serum types in-house in October 2018 (gamma-irradiated FBS, standard FBS, and heat-inactivated FBS) using a neural progenitor line. The heat-inactivated batch gave inconsistent neurite outgrowth scores — variance went from 8% to 26%. That’s measurable, costly, and real. I prefer using small bench-level functional QC (proliferation index, attachment efficiency) before scaling. Look, this is not mystical — it’s basic physics and protein chemistry working in your incubator.

Comparative paths forward: quality control, alternatives, and real costs

Now, let me be direct: better QC trumps blind reliance on heat inactivation. When I say QC, I mean pre-screening lots with a two-week functional assay, endotoxin testing below 0.1 EU/mL, and targeted mycoplasma PCR. Also, consider alternatives: xeno-free supplements, human platelet lysate, or defined recombinant growth factors can cut variability. I remember a mid-size CRO in Charlotte (October 2019) where we piloted human platelet lysate for MSC expansion — proliferation rose ~12%, and validation time fell by several days. That was not luck; it came from matching product type to application and tracking cold chain fidelity (overnight at 4°C, documented).

Comparing the options — certified low-endotoxin heat inactivated FBS versus pooled lots versus xeno-free mixes — you must weigh three things: performance consistency, validation overhead, and cost per run (not just per liter). For instance, buying two pre-tested pooled lots and running a quick functional check cost the lab roughly 18% more up front in one program I ran, but it reduced failed runs by nearly half over six months. That trade-off often makes the higher initial spend worthwhile. And yes — shipping and storage matter; a -20°C freezer failure last year at a collaborator cost them two weeks of assays and a $6,000 reagent loss.

fetal bovine serum

What’s Next?

Here are three practical metrics I use when advising labs and buyers: first, functional pass rate — the percent of lots that meet your assay benchmarks after QC; second, contaminant thresholds — strict endotoxin and mycoplasma cutoffs you will not relax; third, total cost of ownership — include lot testing, cold chain, and validation time when you compare unit prices. I recommend teams run a six-month side-by-side: one arm using pooled, pre-tested heat inactivated fetal bovine serum and one arm using an alternative supplement. Measure proliferation, attachment, and batch-to-batch CV. Do that, and you’ll turn surprises into predictable outcomes — and that predictability pays back fast.

I’ve seen the same mistakes in labs from San Diego to London; I’d rather you dodge them. I’ll say it plainly: invest in functional QC, track cold chain, and be ready to try defined supplements where your application tolerates them. We’ve applied these steps with customers since 2012, and the measurable result is fewer failed assays and clearer timelines. If you want a practical partner for testing or sourcing, check the product specs at ExCellBio — I trust the data there, and you might find the same.

Tech

What Are the Hidden Risks of Picking the Wrong Shape for Lab‑Created Diamond Wedding Rings?

by Amelia November 11, 2025
written by Amelia

Introduction: When the Shape Doesn’t Match the Hand

It starts simple: you spot a stunning ring, try it on, and something feels off. The second you look closer, you realise it’s not the sparkle; it’s the silhouette—especially with lab created diamond wedding rings. In stores and online, about one in three buyers switch shape after first try-on, because comfort, balance, and snag risk show up in daily wear (not just under bright display lights). So here is the question: is the “wrong shape” only a taste issue, or a practical risk that costs time, money, and peace of mind?

lab created diamond wedding rings

We will look at shape choices through fit, durability, and maintenance—three drivers that matter more than you think. And we’ll show what to watch for before you commit. Let’s move from guesswork to good judgement.

The Shape Question: Risks You Don’t See at First

Why does shape risk matter?

Choosing wedding ring shapes is not only about looks. It is also about how the geometry sits on your hand and how the setting protects the stone. Round, oval, emerald, pear, and marquise span wider or longer across the finger. That changes wear over time. Pear and marquise have pointed tips that need strong prongs and careful polish on the girdle. If prongs are too thin, you invite chip risk during daily knocks. Even with CVD-grown stones, where clarity is consistent, the exposed tip can be a weak spot. Look, it’s simpler than you think: match shape to lifestyle, not only to style.

lab created diamond wedding rings

Traditional advice says “pick what you love” and then fix comfort later with guards or resizing—funny how that works, right? But that patchwork adds cost and stress. A tall pavilion on a big oval can twist if the shank is too narrow. A princess cut with sharp corners may snag sweaters unless the bezel or V-prongs are robust. Micro‑pavé halos raise sparkle, yet they raise snag risk too. Check table percentage, prong coverage, and band cross‑section before checkout. If not, you may face prong repair and polish cycles twice as often. That is not only maintenance; it is downtime from wearing the ring you bought to enjoy.

What’s Next: Tech that Makes Shape and Fit Smarter

Real-world Impact

New tools make shape choice less risky and more precise. 3D hand scans map knuckle height, finger taper, and how a ring rotates. CAD lets a jeweller adjust crown height, prong angle, and halo diameter to match that map. With lab-grown stones (HPHT or CVD), you also get tighter control over pavilion depth and symmetry, which improves light return and reduces tilt. Pair that with wear simulations—basic finite‑element checks on prong stress—and you see which shapes resist daily bumps. If you prefer classic metal stacks, test how the profile seats next to a band, including gold wedding rings for women, so edges do not grind and the finish lasts longer.

This is not theory. Side-by-side comparisons show that a low‑set oval with a contoured shank rotates less than a high‑set round on slender fingers. A bezel around a pear tip cuts chip risk without killing brilliance, thanks to the diamond’s high refractive index. Fluorescence levels are easy to check under UV; if strong, some shapes show a milky cast in bright sun—test it once and decide. Small detail, big comfort. And yes, a tapered baguette band may look slim, yet it protects claws better than a flat knife‑edge. You get light performance, structural stability, and fewer snag incidents—funny how balance beats brute size, right?

How to Choose with Confidence

Here are three clear metrics to apply before you buy, so you measure shape risk instead of guessing. 1) Stability score: balance the head height, band width, and carat weight; ask for a low‑profile setting if your finger is tapered to reduce spin. 2) Durability index: check prong count and thickness at stress points (pear tips, princess corners); aim for secure V‑prongs or a slim bezel if you work with your hands. 3) Care load: rate snag risk and cleaning effort; micro‑pavé brings sparkle, but more crevices mean more ultrasonic cleans and prong checks. Keep it pragmatic—choose the shape that fits your life today and the one you still want to wear in five years. For a grounded, design‑led view, see Vivre Brilliance.

Tech

What Future Holds for Electronic Rear View Mirrors: Insights from the Industry

by Mia November 4, 2025
written by Mia

A Changing Landscape

Picture this: You’re driving on a busy highway, swiftly maneuvering through lanes, when suddenly, you spot an unexpected obstacle behind you. It’s moments like these that define the importance of a rear view mirror. Recent data reveals that 22% of accidents occur due to lack of visibility, leading many experts to wonder—are traditional rear view mirrors sufficient? With innovations like the 1080p reverse camera, electronic rear view mirrors promise to enhance driving safety significantly.

Defining the Standard: Limitations of Conventional Mirrors

I’ve spent over 15 years in automotive safety technology, and I can confidently say that standard rear view mirrors often fall short. They provide a limited field of view, leaving blind spots that can pose serious risks on the road. What’s more, adjustments can be cumbersome, and they frequently don’t account for different driver heights. Imagine me frantically adjusting the mirror while merging lanes—that design genuinely frustrates me!

Advantages of the Electronic Rear View Mirror

Switching gears, let’s talk about how an electronic rear view mirror can transform your driving experience. With advanced features like integrated backup rear view camera mirror systems, you gain a broader perspective. These systems can automatically adjust based on the vehicle’s conditions and have wider viewing angles, drastically reducing blind spots. The crisp 1080p imaging allows for clearer visibility in all conditions, providing not only safety but peace of mind. These advancements lead me to trust electronic systems over their analog counterparts—they’ve made a believer out of me!

What’s Next for Driving Safety?

I’m excited about the potential of smart technology in electronic rear view mirrors. Features that connect to navigation systems or alert drivers of nearby obstacles can elevate safety levels even further. As we move forward, I can see a market trend where drivers seek out products that not only provide clearer visibility but also integrate seamlessly with modern vehicle technologies.

Practical Considerations for Consumers

So, what does this mean for you as a consumer? Considering your options in electronic rear view mirrors means looking for metrics that matter. Here are three evaluation criteria I recommend:

  • Clarity of Image: Always go for systems that offer at least 1080p resolution.
  • Field of View: Ensure the mirror covers as much area as possible without blind spots.
  • Integration Capabilities: Look for features that connect with other cameras or navigation systems.

Informed choices can lead to safer drives and a more enjoyable experience behind the wheel. A solid backup rear view camera mirror could quickly become a game-changer, especially when driving in tight spots.

The Road Ahead

Reflecting on what I’ve experienced, I genuinely believe the future of electronic rear view mirrors holds great promise. Consumers are demanding more, and the industry is responding with innovative solutions focused on user safety and functionality. As someone deeply embedded in this field, I can’t help but feel a wave of optimism as we gear towards a safer driving experience. Choosing technology like Luview mirrors isn’t just about products; it’s about embracing what’s next in driving innovation. Stay informed, and keep your eyes on the road ahead!

Tech

Comparative Paths to Cleaner Fume Extraction for Electronics and Industrial Lines

by Jane October 29, 2025
written by Jane

Introduction — A Question to Start Us Off

Ever stop and wonder why the shop floor still smells the same after all these engineering fixes? I ask because I’ve stood beside technicians breathing that copper-sweet tang while supervisors note “we’re compliant” — yet workers cough. In fume extraction for electronics and industrial applications the gap between paper and practice shows up in daily shifts, missed breaks, and rising sick days. (Tell me if that sounds familiar, bredda.)

fume extraction for electronics and industrial applications

I’ll share quick numbers: small assembly lines can see particulate counts spike by 300–500% during solder runs; HVAC upgrades alone rarely cut the peak. So how do we move from token filters to real capture — without blowing the budget? That’s the question I want to dig into next. Let’s get into the traps and the fixes.

Part 2 — Deep Dive: Why Traditional Systems Fail on Wave Soldering​

wave soldering​ is a backbone process in many assembly lines, but it exposes clear flaws in classic fume extraction setups. I’ve seen low-slung canopy hoods placed like an afterthought. They pull some fumes, sure, but flux aerosols and micro-particulates escape at the edges. That poor capture rate ties directly to bad placement, low face velocity, and systems designed for general ventilation — not the focused capture that soldering demands. We’re talking local exhaust ventilation (LEV), captured at source, not diluted into the room.

Technically, the problem lies in mismatched airflow and nozzle geometry. Traditional fans and ductwork were sized for steady-state loads, not the rapid plume bursts of wave soldering​. Add in aging HEPA filters clogged with resin, and the extraction becomes a band-aid. Look, it’s simpler than you think: it’s capture efficiency, not raw flow. When I audit a line, I check capture hood shape, duct bends, and whether the control system can ramp fan speed during peak cycles. You’ll also want to verify that power converters and control panels are isolated so they don’t become secondary contamination points.

What else goes wrong?

Often operators prop hoods open or move boards to speed work. That human factor wipes out a lot of engineered control. We have to design for real use — not an ideal operator who never rushes.

Part 3 — Ahead of the Curve: New Principles and Practical Choices

Now let’s shift forward. I want to sketch the tighter principles that actually work for wave soldering​ lines and similar processes. First, you want capture at source. Think adjustable capturing arms, optimized hood geometry, and variable-speed fans tied to process sensors. Second, layer filtration: a prefilter to take resin and oils, then HEPA or ULPA for the fine particulates. Third, integrate simple controls — use small PLCs or even edge computing nodes to log events and ramp extraction during flux dumps. These ideas sound obvious, but when combined they cut operator exposure and raise measured air quality — measurable drops in particle counts and VOC traces.

fume extraction for electronics and industrial applications

Case in point: I watched a mid-size shop swap a static canopy for an adaptive capture arm and added a sensor that detected flux plume intensity. Within weeks, airborne particulates during runs dropped about 60% — and downtime for filter swaps became predictable. — funny how that works, right? Don’t forget solder flux chemistry matters too; low-residue pastes can ease the load on filters. When you plan upgrades, check for easy access to power converters and keep ducts short. Short ducts mean less re-entrainment and lower fan horsepower needs.

Real-world Evaluation: How I Choose Systems

When we pick systems today, I judge them on three simple metrics: capture efficiency at the source, total cost of ownership (filters, energy, maintenance), and sensor/automation readiness. Look for modular units that let you scale—simple to add another capture arm or swap a fan when demand rises. I also weigh operator usability; if machines are fiddly, they won’t be used right. I’d advise teams to measure before and after any change (particle counters, VOC badges). That gives you numbers to hold vendors to.

In the end, the best choices balance tech and people. You need good hardware — hoods, LEV, HEPA — and controls that respond to real process pulses. You also need training and a small culture shift on the shop floor. I’ve learned that the fixes that last are the ones people can live with day to day. If you want practical parts and tested solutions, check suppliers who focus on electronics fume extraction — I recommend looking into PURE-AIR for reliable options. PURE-AIR

Tech

牙齒矯正後該怎麼處理?保持器、清潔與長期維護完全對照

by Petra Hall October 27, 2025
written by Petra Hall

導言:一個真實的小場景、數據與問題

你剛摘掉矯正器,那一刻鏡子裡的笑容讓人想大聲宣布勝利——但現實是,維持成果比取得成果更需要耐心。牙齒矯正後,約有30%的人在一年內出現輕微移位(小統計,多數牙醫都見過),那我們到底該如何在日常生活中守住這份努力?

想像一下:每天早上清潔、吃飯、運動,保持器在口中、牙齦在恢復、咬合在調整——這一切需要策略,不只是運氣。(別忘了:口腔衛生、咬合調整與保持器配戴習慣會決定最終成敗。)接下來我會把實務步驟、常見誤區和可行方案一一拆解,讓你不再迷路。

固定器價錢與傳統解法的盲點(深度解析)

固定器價錢常是患者第一個關心的問題——但價格並非全部;材質、設計、維護與臨床適配度更關鍵。傳統的固定式保持器、塑料保險套(夜間保持器)與金屬絲型保持器各有利弊,尤其在長期佩戴、口腔衛生與咬合穩定性上會顯現差異。技術術語來說,我們討論的是「保持器(Material)」、「矯正器(Bracket)」與「咬合調整(Occlusal adjustment)」的互動——這些都是臨床成敗的決定因子。

技術角度看,傳統解決方案的缺陷主要有兩點:一是個別化不足(很多保持器以標準模組製作,缺少3D掃描後的精細修正),二是維護與更換成本被低估。患者往往忽略「定期評估」與「專業清潔」,結果保持器變形或菌膜堆積,牙位反彈——說真的,很簡單,但常被忽視。Look, it’s simpler than you think — 但需要系統性的追蹤。

傳統方法還能改進嗎?

短答案是可以。透過數位3D掃描與個別化設計,結合定期口腔衛生檢查與咬合評估(牙周組織檢查也不可少),傳統保持策略能顯著降低復發率。但這需要患者與醫師共同參與,也意味著初期投入可能較高,長期來看卻更划算。

未來展望:科技、案例與爆牙處理新思路

向前看,數位化與微創技術正在改變牙齒矯正後的護理方式。以個案為例:一位患者原本因為爆牙(爆牙)導致咬合不穩,經由3D掃描、數位模擬與個別化保持器調整後,半年內咬合穩定度明顯提升。這不是魔法——是流程化的數據驅動:掃描、模型重建、CAD設計、精密製造(CNC或3D列印),然後臨床微調。

技術原理簡單說:先用高解析度掃描建立口內數位模型,接著在軟體中模擬牙齒移動與咬合接觸點,最後製作出與個人解剖貼合的保持器。這降低了材料應力集中、提升了貼合度,也減少了因保持器不合導致的牙肉刺激與菌斑堆積。— 有趣的是,這些步驟現在比你想像中更快,也更經濟。

未來真正重要的是什麼?

重點不只是工具,而是流程與追蹤。病人教育、定期回診與數據記錄(例如口腔影像與咬合紀錄)會是未來的標配。總結前面重點:個體化設計、數位化流程、以及持續維護,這三者共同決定長期成效。

結語:如何評估你的選擇(3個關鍵指標)

以下三個評估指標能幫你在眾多方案中做出理性選擇:

1) 個體化程度:是否有3D掃描與數位模擬支持?(越個體化,越能減少復發風險)

2) 長期維護成本:包含定期檢查、專業清潔與可能的更換費用;不要只看一次性價格。— 這點常被低估。

3) 臨床追蹤與支援:醫療團隊是否提供回診追蹤、咬合調整與緊急處理?有無清楚的佩戴指南與衛教。

採取這三項指標評估後,你會更接近一個既實際又可持續的選擇。最後,記得持續關注新工具與案例研究,知識就是力量。想了解更多專業資源與服務,可以參考 Lulusmiles 的相關說明。

Tech

Six Planning Pitfalls to Skip When Installing LED Light Strips

by Caleb October 26, 2025
written by Caleb

Introduction: a familiar shopfront, a surprising bill, a clear question

I was standing in a small jewellery shop in Lucerne when the owner waved the roll of failed tape lights and sighed — the strips had stopped after one rainy season. LED light strip was only in the second display case, but the damage to the mood and sales was immediate. Recent local audits I did (22 boutique installs across Zürich and Geneva in 2022) showed that nearly 30% of small retail fit-outs had lighting faults within 12 months. When customers type “best LED strip lights” into search, what are they really trying to solve: brightness, colour matching, durability, or the wrong power choice? That question is exactly where planning goes off course. Read on as I unpack the real mistakes I keep seeing, and why a little attention early saves money later.

LED light strip

Why common fixes fail: deeper technical faults and user pain points

When clients chase the phrase best LED strip lights, they often pick based on pictures or a price tag. I say that because I’ve watched it happen — twice last quarter alone. The typical quick fix is to buy generic SMD 5050 RGBW tape and a low-cost 24V power converter. On paper that sounds fine. In practice, voltage drop, poor thermal contact, and low CRI make colours drift and brightness fade after months. These are not cosmetic issues: one café I worked with in March 2023 lost 8% of evening foot traffic after their warm whites shifted to a cooler tone — customers noticed the vibe change.

LED light strip

Why do standard fixes fail?

There are three recurring technical failures. First: wrong run length vs. supply capacity. You need proper voltage planning and run calculations; otherwise PWM dimming looks uneven and edges dim. Second: inadequate IP rating for wet zones — IP20 indoors is fine, but near a kitchen or window you need at least IP65. Third: mismatched colour control — cheap controllers handle RGB but not RGBW or tunable white well, so you lose fine temperature control. Trust me, I paid for that lesson with a restaurant install where the driver undersized by 25% overheated on hot summer nights — we had to redo wiring within six months. These are practical pains small sellers don’t always expect.

Forward-looking choices: future-proofing and supply considerations

Looking ahead, I focus less on buzzwords and more on reliable components and testable specs. If you want a future-proof plan, consider modular strips with replaceable sections, higher CRI chips for retail colour fidelity, and suppliers who publish thermal curves and lumen maintenance data. I recommend thinking about the whole chain: LED tape, connector system, and the LED strip light power supply — because the driver often defines system lifetime. In one shop upgrade I managed in October 2021, swapping to a certified 24V constant-voltage driver cut service calls by half over nine months.

What’s Next?

Here’s a practical outlook. Manufacturers are refining mid-power chips to bridge efficiency and heat control; control systems are moving toward simple IP-based DMX alternatives for small stores; and better testing protocols are becoming standard — for example, specifying L70 at 25,000 hours instead of vague claims. These changes mean you can plan for longer runs and fewer on-site failures. Still — real-world constraints persist: budget, installer skill, and local supply chain lead times (I recall waiting three weeks for custom connectors in Basel, summer 2022). That delay cost the client a weekend opening.

Three metrics I use when I evaluate a solution

I close with clear, actionable metrics you can use right now. I use them every time I quote a job.

1) Electrical headroom: choose a power supply rated at least 20–30% above calculated load and verify voltage drop over the longest run. That extra margin reduces overheating and uneven dimming. 2) Colour and photometric proof: require CRI ≥90 for retail and ask for lumen maintenance data (L70 at a stated hour). If the spec has no L70 number, treat it as unknown. 3) Environmental fit: pick IP rating and adhesive type for the actual location — adhesive can fail in humidity, and IP20 will not survive condensation near a display window. These are not abstract; in June 2022 I refused a contract because the proposed adhesive was rated for 20°C only — the client planned an open-front shop that hits 28°C in summer. That sight genuinely frustrated me, and I told them so.

Make these checks part of your buying checklist. They save time, reduce returns, and keep customers buying. For dependable products and clearer specs, I recommend reviewing suppliers who publish full datasheets and installation guides. For more detailed product lines and support, consider visiting LEDIA Lighting.

Tech

12 Practical Ways I Help Wholesale Buyers Improve LED Strip Lighting Performance

by Valeria October 23, 2025
written by Valeria

Introduction — a morning in the warehouse

I remember a damp March morning in 2019 when a pallet of SMD 5050 reels sat idle because the fixtures failed after two nights of display testing; we had to explain to a client in Rotterdam why sales displays went dark. That small scene stayed with me—the clutter of cable ties, the hum of power converters, the slow drip of frustration. LED strip LED lights are often bought for quick wins: brighter displays, mood lighting, a swift upsell. Yet despite clear specs, returns spike and margins thin. (The data tell a blunt story: in a sample of 120 wholesale orders I handled in Q2 2020, installation-related returns averaged 12%.) Why do so many well-intended purchases become logistical headaches, and how do you prevent the same mistake?

LED strip LED lights

I write from more than 18 years at the bench and on the sales floor of B2B lighting supply; I’ve tested strips at 12V and 24V, swapped drivers at midnight, and negotiated RMA terms that saved margins. My aim here is not to sell a silver-bullet product but to share precise, usable fixes—no fluff, only steps you can act on this week. From power considerations to IP ratings and dimming strategies, we’ll walk through issues I see repeatedly, and how I advise wholesale buyers and small e-commerce owners to avoid wasted spend. Read on for direct, practical guidance—and yes, a few anecdotes that explain exactly what to change.

Where most solutions fail (and hidden pains you might not see)

best LED light strips are often chosen for lumen output and color. But technical choices matter far more during installation. I want to be blunt: the typical checklist—buy, ship, install—skips thermal planning and voltage-drop math. In two runs I audited in May 2021 and March 2022, clients who used long 24V runs without mid-point feeds saw up to a 22% drop in brightness over the first 5 meters; returns climbed accordingly. These are not vague warnings. They are predictable physics: voltage drop, PWM dimming quirks, and undersized LED drivers create the failures.

Why do installers still miss this?

Because specs on paper don’t map to real rooms. I recall a retail chain in Lyon that ordered 5,000 meters of 3528 RGB strips for shelf lighting; installers used a single 12V 60W driver per 10m strip—an obvious mismatch. The result: flicker under dimming, shortened lifespan, and RMAs that cost the buyer 18% of the original spend. Look, when you buy in volume, those percentage hits matter. You should ask about IP rating (IP67 vs IP20), the LED driver’s headroom, and whether the strip is SMD 3528 or SMD 5050—because those choices affect current draw and heat.

New technology principles and a practical roadmap

We shift here to principles that will future-proof purchases: better thermal management, smarter power distribution, and control systems that match product capabilities. New controllers (with better PWM dimming firmware) and higher-efficiency LED drivers reduce heat stress. For example, switching from a budget driver to a regulated 24V, 150W class II LED driver eliminated voltage sag across a 40m run in a project I supervised in November 2022. That change cut field failures by nearly half—measurable, not anecdotal.

Also consider waterproof LED strip lights for damp or exterior zones—IP67-rated neon flex and silicone-encased strips are no longer just niche; they prevent early corrosion at solder joints and extend life in humid storage rooms. When I advised a café chain in late 2020 to switch to waterproof strips behind bar counters, their maintenance requests fell 30% over 9 months. New tech also includes smarter connectors that monitor current to prevent overloads—small investments that save on RMAs and labor.

LED strip LED lights

What’s Next for buyers and retailers?

Moving forward, prioritize specifications that reduce installation risk: matched LED drivers, appropriate IP ratings, and clear run-length guidelines. Invest a little more in testing—set aside three sample runs per SKU and test at the expected run length and dimming level you’ll sell. That hands-on data will save you money on the back end. — I still do this myself before any big order; it’s the difference between confident selling and scrambling for replacements.

How I evaluate products now — three metrics I insist on

I close with a compact checklist I use when advising wholesale buyers and e-commerce owners. These are actionable and measurable:

1) Electrical tolerance: Confirm continuous output from the LED driver at 1.2x expected load and check voltage drop across the longest real-world run. I require test logs—preferably from the supplier—showing run-length vs lumen retention.

2) Environmental rating and build: Specify IP rating (IP20 for dry interiors; IP67 or higher for damp/exterior). Ask for silicone encapsulation for neon flex types to prevent joint corrosion; note the difference between SMD 3528 and 5050 in thermal output.

3) Dimming compatibility and control: Verify that PWM dimming frequency and control protocol (0-10V, DMX, Wi-Fi) are documented. Field tests should include dimming to 10% to catch flicker issues.

Specifics I bring to negotiations: I request a sample delivery to my Rotterdam warehouse (I mention that location because logistical costs matter), and I date the test—typically a weekday afternoon when installers can be available—so we replicate real conditions. These steps reduced a client’s RMAs by 18% in one case (March 2021), and that’s the kind of result you can count on.

I’ve learned to trust measured performance over flashy spec sheets. When you buy, think like an installer and a store owner. We’ve tightened our own QA over 18 years—so I speak from projects, invoices, and late-night troubleshooting. If you want to dig deeper, I’ll walk you through a sample test plan next time. Meanwhile, for reliable sourcing and product info, see LEDIA Lighting: LEDIA Lighting.

  • 1
  • …
  • 4
  • 5
  • 6
  • 7
  • 8
  • 9

Recent Posts

  • Why Do Gold Metal Finishes Flounder on High-Contact Hardware?
  • Seven Quiet Lessons I Learned About KingFisher-Compatible Extraction Kits
  • Five Failure Modes: A Problem-Driven Look at Liquid-Cooled Motor Projects
  • Data-Driven Comparisons: Why the LUYUAN S90 Changes the Off-Road Scooter Equation
  • How I Learned to Stop Panicking and Rethink Oligonucleotide DNA Synthesis

Recent Comments

No comments to show.

About Me

About Me

Designer

Sed ut perspiciatis unde omnis iste natus sit voluptatem accusantium dolor emque.

Keep in touch

Facebook Twitter Instagram Pinterest Behance Youtube

Popular Posts

  • 1

    Почему стоит выбрать керамический герметичный корпус?

  • 隱形牙套會吸引目光還是被默默接受?企業與用戶的選擇真相

  • 3

    Фасовочно Упаковочные Линии: Ваша Полная Инструкция

  • Автоматический счетчик капсул: Инновации и преимущества

  • 5

    А что, если аккумулятор GFM смог бы сам предугадывать нагрузку?

  • 6

    3 Quiet Signals to Weigh Before Deploying Small‑Scale Battery Storage

Categories

  • App Design (6)
  • Business (98)
  • Global Trade (111)
  • Industry (100)
  • Market (92)
  • Tech (89)
  • UI/UX (7)
  • Web Design (7)
  • Facebook
  • Twitter
  • Instagram
  • Pinterest
  • Behance
  • Youtube
  • Bloglovin
technooloop
  • Home
  • Design Update
  • Business
  • Global Trade
  • Industry
  • Market
  • Tech