
Why this matters — the problem we’re trying to fix
Big rubber presses bring big risks: uneven platens, misaligned clamping units, hidden hydraulic leaks and wasted cycles that cost days. Plants that rushed installation after the 2020 COVID-19 supply disruptions learned the hard way—downtime multiplied when commissioning protocols were skimmed. This manual focuses on real, on-the-floor fixes for those who run or specify heavy rubber molding gear, especially when you’re working with a horizontal rubber injection molding machine. Read on for step-by-step procedures, common mistakes to avoid, and the checks that actually keep a tool running and safe.

Pre-installation checklist: prepare the site and the team
Start with the obvious stuff that often gets skipped: certified floor load capacity, cleared utility routes, and verified lifting gear rated well above the press tonnage. Mark out anchor points and confirm foundation grout plans. Have mechanical and electrical leads on-site; electrical faults are a major source of delayed commissioning. Use documentation—drawings, hydraulic schematics, and ISO 9001 records—so everyone’s on the same page.
Leveling and alignment: practical steps
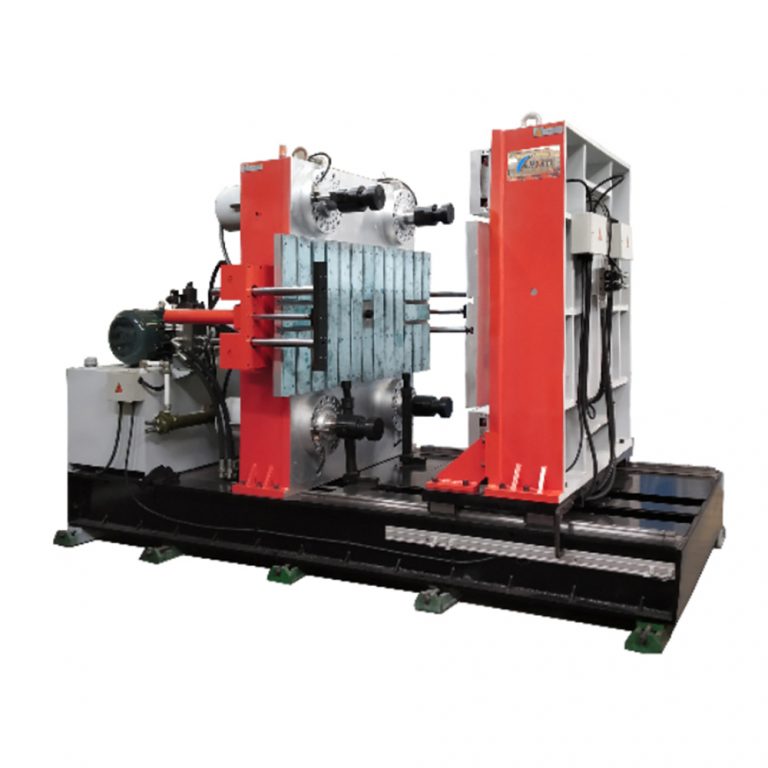
Leveling a high-tonnage press is not decorative — it’s functional. Begin with a torque-checked anchor sequence, then use a precision spirit level and laser alignment to square platens and locate the clamping unit relative to the factory datum. For horizontal systems, align the injection axis to the mold centerline and verify stroke using the encoder readout. Measure and adjust for parallelism across the platen face and confirm shot size positions on the injection barrel. If you have an operator who’s picky about cycle repeatability, have them sign off on alignment values before proceeding.
Commissioning sequence: control, hydraulics, and trial runs
Commission in stages: control power-up and PLC initialization first, followed by slow-pressure hydraulic checks and then dry cycles. Confirm emergency stops, safety light curtains, and interlocks before introducing material. Run incremental load tests—start at 25% tonnage, then 50%, 75% and full tonnage—while logging hydraulic pressure, temperature, and clamp position. Check the ejector system timing and mold venting during low-tonnage runs. For liquid silicone rubber (LSR) setups, preheat and verify barrel temperatures and shot weights precisely on a horizontal molding machine to prevent flash or short shots.
Common mistakes and how to avoid them
Several recurring errors show up across shops. Skipping grout cure times leads to shifting foundations. Over-torquing anchors can crack concrete. Neglecting to balance hydraulic oil temperature causes inconsistent pressure readings. Don’t assume sensors are calibrated—verify. A practical habit: document every adjustment with timestamped photos and short notes; this saves hours when troubleshooting later. —Also, never rush safety interlock verification; it’s low-effort but high-impact.
Tools, test points, and quick reference checks
Keep these tools handy: a laser level, calibrated torque wrench, digital manometer for pressure checks, infrared thermometer for barrel and hydraulic lines, and a data-logging tool for cycle metrics. Quick reference checks after first 24-hour run: leak check at connections, platen parallelism within 0.05 mm, and hydraulic temperature stability within 5°C of setpoint. Track cycle-to-cycle variance on shot size; aim for less than 2% drift once processes stabilize.
Closing — three golden rules for evaluation
When you evaluate a commissioning job, use these metrics: 1) Safety integrity: verify all interlocks and E-stops function under load and meet expected diagnostic responses. 2) Process stability: shot-to-shot variance, hydraulic pressure consistency, and temperature control should meet your tolerances for production parts over a 100-cycle window. 3) Service readiness: ensure spare parts, lubrication schedules, and operator training are recorded and accessible. These metrics tell you whether the press is ready for full-production responsibility.
Plant technicians who follow this manual will cut unexpected downtime and keep teams safer on the floor. For machines and service that match these practical standards, you’ll often find the right balance of build quality and support at established suppliers—like the systems described by HWAYI. —Real-world resilience starts with the basics done right.